Roasting coffee at home is one of those hobbies that can seriously upgrade your daily coffee routine. If you’ve ever wondered why some cups of coffee just blow you away, chances are the secret is in freshly roasted beans. The cool thing is, you can roast coffee in your kitchen using simple gear, a handful of basic techniques, and a little practice.
When I started roasting my own coffee, I didn’t have fancy gear or deep technical knowledge. What I found is that you don’t need to be an expert from the start. Even if you’re a total beginner, learning how to roast your own beans is practical, rewarding, and a little bit addictive. In this guide, I’ll break down what coffee roasting actually means, how beans transform during the process, the gear you’ll need, and every major step to get you confidently roasting at home.
Whether you want to improve your morning pour over or just enjoy the freshest coffee possible, this all-in-one guide has you covered from bean to cup. Ready to jump in? Let’s go.
What Coffee Roasting Actually Is
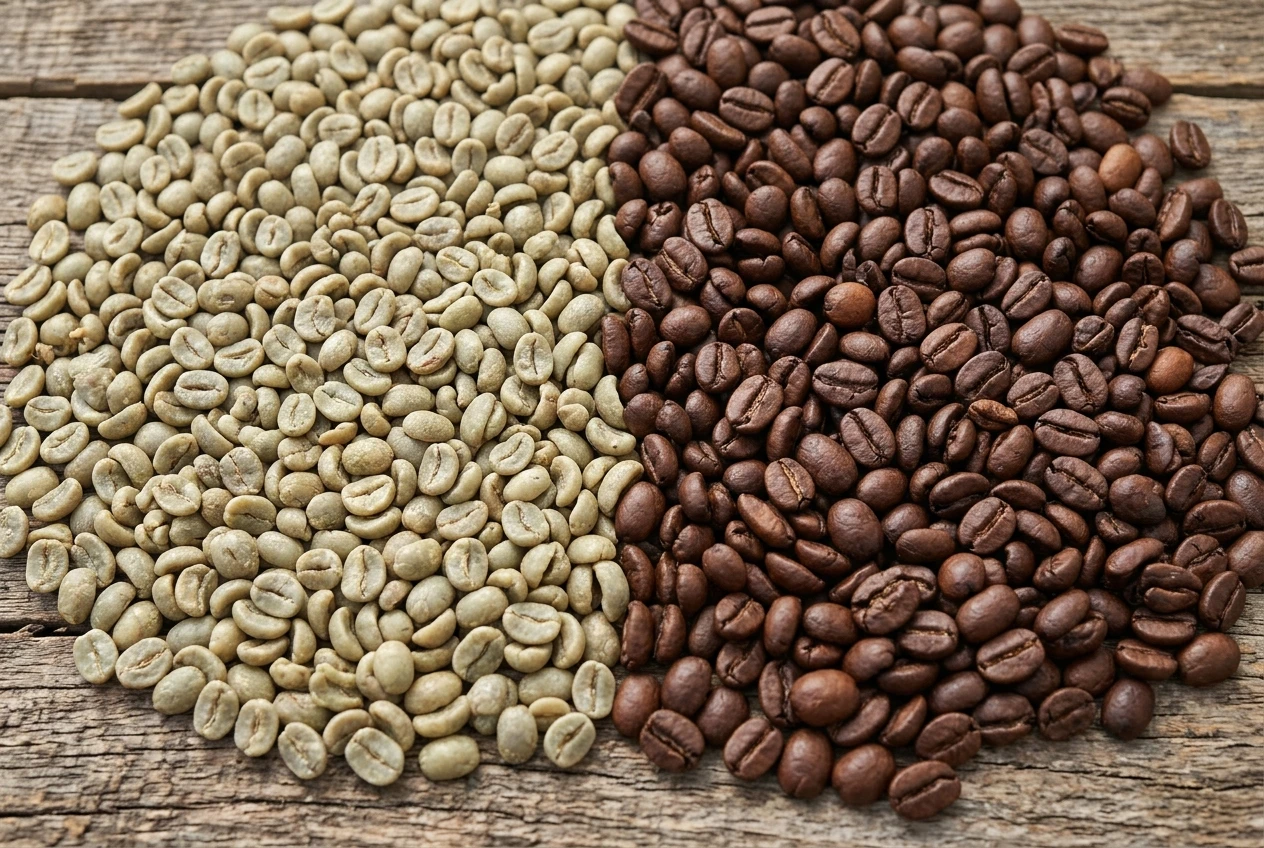
Roasting is how green coffee beans become the brown, aromatic beans we all recognize. The process changes the bean’s color, texture, flavor, and chemistry. Before roasting, green beans have a grassy, almost pea-like scent and aren’t usable for brewing—they’re super dense and taste awful.
Everything about the flavors you love—from bright, fruity notes to deep, chocolatey richness—comes from the roasting process. You’re basically running a bunch of chemical reactions that change simple, raw beans into the complex profiles you find at a café. The time and temperature you use make a big difference. Roasting is like cooking; fast and hot gives different results than slow and steady.
What Happens During Coffee Roasting
Moisture Evaporates: Green beans lose water and shrink a bit.
Beans Turn Yellow: They go from green to a light yellow or tan, and smell kind of like hay.
Chemical Change: Around 350°F (177°C), sugars begin to caramelize, and the structure of the bean starts changing.
First Crack: Pressure inside the bean pops it open, kind of like popcorn.
Flavor Development: This is where you get all the good stuff—from light, bright notes to deep and roasty flavors, depending on how long you roast after the first crack.
Second Crack: For darker roasts, there’s another round of popping. Oils start coming to the surface.
The whole process is pretty quick; usually about 10-15 minutes per batch at home. Alongside these changes, you’ll also see and smell a dramatic shift as nature’s chemistry transforms those green beans into something magical. Roasting truly brings to life the full potential of what the beans can offer, marrying technique with a bit of art and intuition. As you roast, pay attention to subtle cues—scent, color, and that all-important first crack—and you’ll quickly get a feel for what makes a good batch great.
What You Need to Roast Coffee at Home
One of the things I like about home roasting is how flexible it is. You can keep it super simple or geek out with gadgets. Here’s a quick list of what you really need to get started:
Basic Home Coffee Roasting Gear
Green coffee beans: You’ll want beans specifically for home roasting (more on this below).
Roaster or roasting setup: You can use a dedicated home coffee roaster, a popcorn popper, a skillet, or even your oven.
Metal colander or baking tray: For cooling the beans rapidly after roasting.
Stirring utensil: If you’re roasting manually (like in a pan), you’ll want a wooden spoon or spatula.
Scale (optional but handy): Measures out beans and helps with consistency.
Timer: Your phone works fine for tracking roast progress.
Good ventilation: Roasting makes smoke and chaff (paper husk bits). An open window, stovetop vent, or a fan is super useful.
Storage container: Airtight jars or resealable bags work once your beans have cooled and rested.
That’s all you need to get started. There’s nothing wrong with starting small; lots of people begin with a pan or a popcorn popper before investing in a specialty roaster. With time, you’ll figure out what extra gear helps your routine without being overwhelming. The most important thing is simply to begin and learn what works best for your setup, kitchen, and taste preferences.
Types of Coffee Roasters for Home Use
There are several ways to roast coffee beans at home, from basic to more advanced. Each method has its own learning curve, but all can deliver great results if you pay attention to timing, temperature, and stirring.
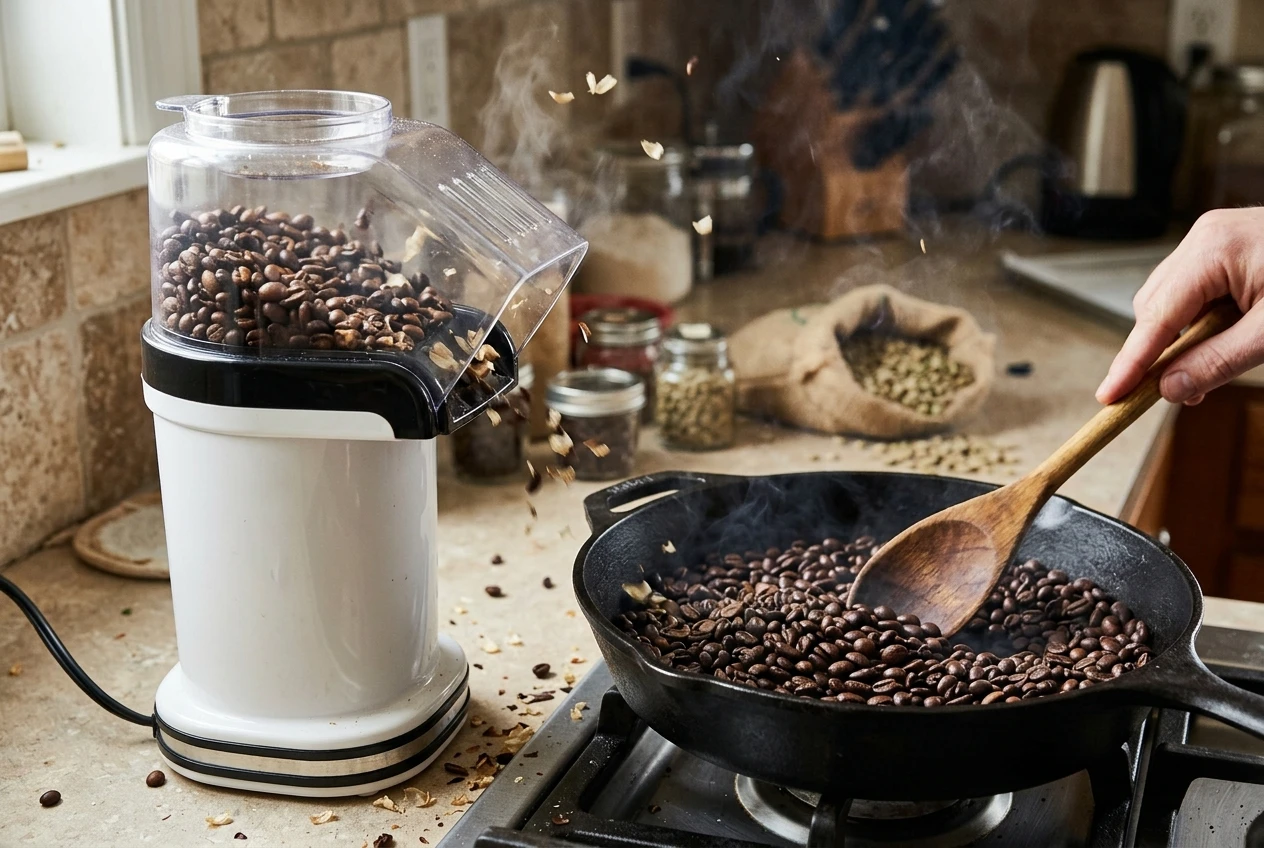
Stovetop / Pan Roasting
Simple and budget-friendly
Just needs a heavy skillet or frying pan and a stovetop
You stir beans throughout (around every 15-30 seconds)
Batch size is small: usually a cup or two of green beans at a time
Can get smoky, so open a window or use a fan
Flavor results are rustic and uneven, but it’s super hands-on and beginner-friendly
Popcorn Popper (Hot Air Method)
Super popular for getting started
Works best with a hot air popper (the kind with side vents, not bottom)
Beans are blown around constantly, creating an even roast
Quick; whole batch roasts in 4–7 minutes
Needs to be done outside or under a range hood if possible (lots of chaff/smoke)
Be sure to use a popper with metal popping chamber—not plastic
Oven Roasting
Easy if you don’t have any other gear
Spread beans in a single layer on a perforated baking sheet
Oven is preheated to around 450°F (232°C)
Stir beans every couple of minutes
Chaff can be messy, and it’s hard to monitor the roast progress, but it definitely works
Dedicated Home Roasters
Designed specifically for coffee roasting
Give you more control over heat, airflow, and timing
Some let you see or hear the beans as they roast
Batches range from 3 oz to 1 lb (about 85g to 450g)
Models like the Behmor 2000AB, Fresh Roast SR800, or Gene Cafe are worth checking out
Tend to be an investment ($150 to $700 or more), but pretty convenient once you’re serious
Trying out different roasting methods helps you check out which fits your lifestyle and goals. Experiment with a pan one week, then borrow a popcorn popper; explore a dedicated roaster later if you fall in love with home roasting. The variety keeps things fun and educational—the more you try, the more you’ll learn.
Choosing and Sourcing Green Coffee Beans
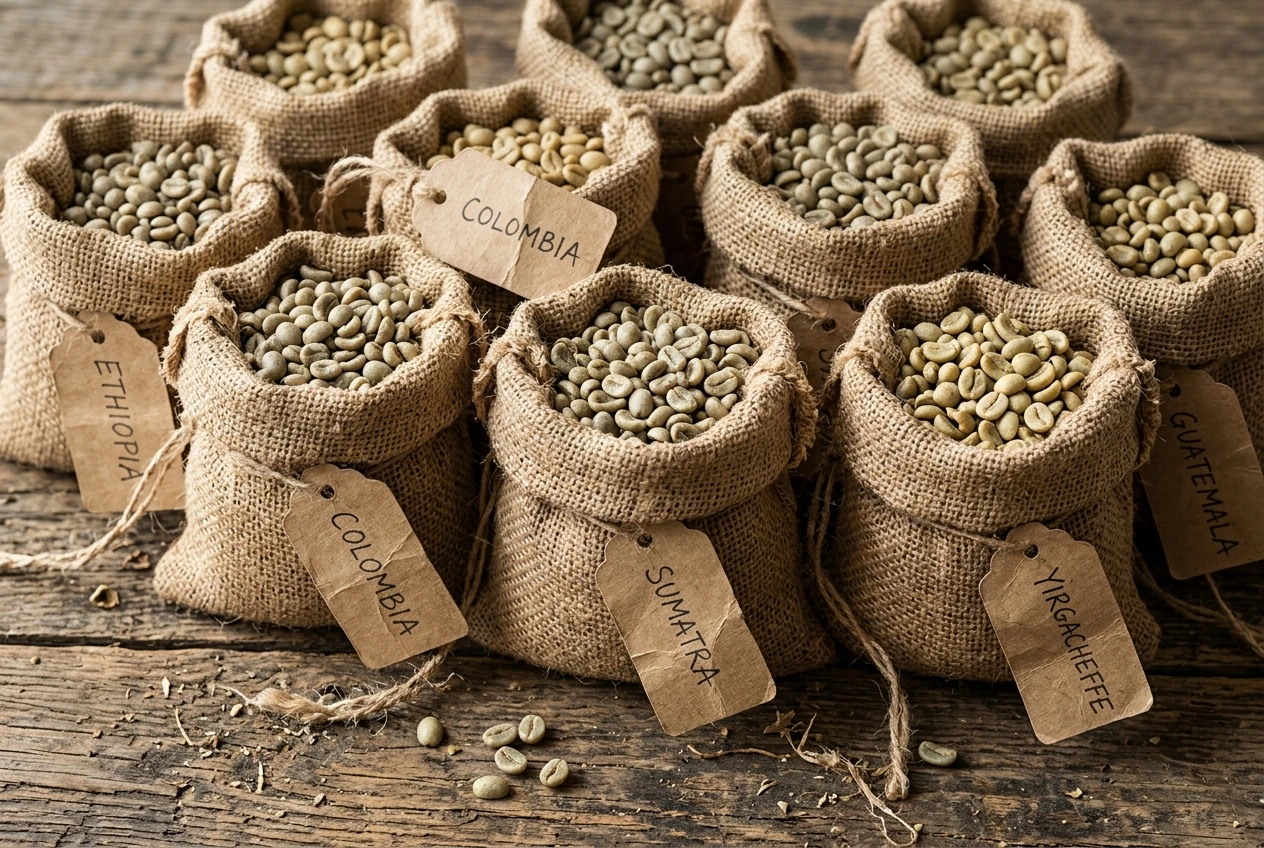
Roasting starts with green coffee beans, which are raw and unroasted. You can’t use regular grocery store coffee for roasting; it has to be green. Thankfully, there are a ton of great places online and locally to buy small bags for home roasting. Exploring a few origins is one of the best parts of coffee roasting—think of it like the “research” phase where tasting is encouraged!
What to Look for In Green Beans
Freshness: Beans keep for a year or more, but the freshest batches (harvested within the past few months) taste the best.
Origin: Each country—Ethiopia, Colombia, Brazil, Guatemala—brings distinct flavors. Try a couple to see what you like.
Processing Method: Washed beans tend to have clean, bright notes; natural or dry-processed beans are fruitier and more complex.
Bean size and shape: Uniform beans roast more evenly.
Sample packs: Many suppliers sell “samplers” so you can experiment with origins and find what you love.
Recommended green coffee bean suppliers include Sweet Maria’s, Bodhi Leaf, Coffee Bean Corral, or any local homebrew supply store. Starting with 1 lb (about 450g) is pretty manageable for most beginners. If you’re curious about flavor, go ahead and order small quantities of several types. Tasting how different origins respond to roasting is part of the fun.
Buying beans directly from origins—either through direct trade or local roasters—adds another layer of connection and can sometimes lead to unique, limited lots. Beans come in all shapes, densities, and grades, so don’t be afraid to try something unfamiliar.
Understanding the “First Crack” & “Second Crack” Phases
Two main moments during roasting, the “first crack” and “second crack,” help you tell what’s going on inside the bean, even if you can’t see everything yourself. These cracks are pretty important for timing and flavor control. Understanding them helps you land the roast level you’re looking for.
First Crack
This is the stage where you’ll hear beans start to make crackling or popping sounds, like light popcorn. It usually happens between 385°F–400°F (196°C–204°C) and means that water vapor is building up enough pressure to rupture the bean’s fiber shell. Once you hear first crack, you’re at the “light roast” stage. Aromas get toasty, beans change color rapidly, and things start to smell a lot more like actual coffee. For many pour over and light roast lovers, this is the stopping point.
Second Crack
If you continue roasting, you’ll eventually hear another round of pops, but these are a little sharper and more staccato. This means the cell walls are fracturing further, letting oils reach the surface. Second crack usually means you’re entering “medium-dark” or “dark roast” territory. For espresso or French press fans, this is where you’ll likely go.
How to Identify Different Coffee Roast Levels
Roast level is all about how far you go into or beyond the cracks above. Each stage creates different flavors, colors, and oil content on the beans. Here’s a quick breakdown of the common roast levels and what to expect:
Light Roast
Beans are light brown, dry, no surface oil
Acidity and unique flavors from origin are most pronounced
Stopped right at or just after first crack
You’ll get bright, floral, or fruity flavors
Good for pour overs, Aeropress, or drip coffee
Medium Roast
Beans are medium brown, still dry-looking
Balance between acidity, sweetness, and body
Stopped 1–2 minutes after first crack
Most common in American drip coffee
Nice for French press and everyday brewing
Medium-dark Roast
Beans take on a richer brown, sometimes with faint oil
Lower acidity, more chocolate, nutty, or caramel notes
Stopped at the beginning or midway into second crack
Great for espresso or strong brews
Dark Roast
Beans are very dark, often shiny with oil on the surface
Bitterness increases, origin flavors fade, body gets heavier
Stopped deep into or at the end of second crack
Tastes like dark chocolate, toast, or smokey notes
Popular for espresso and stovetop coffee makers
Knowing your roast level isn’t just visual—it’s a full-sensory moment. Smell and even touch help, too. As you build confidence, you’ll quickly learn to spot exactly where to end your roast for your favorite flavor.
The Basic Home Coffee Roasting Process (Step-by-Step)
The best way to learn is by trying it yourself, but here’s a reliable roadmap I follow every time I roast coffee beans at home.
Weigh and Prep Your Beans: Measure out ½ cup to 1 cup (about 50–100g) of green coffee beans. Spread them out on a tray and pick out any debris.
Preheat Your Roaster: For stovetop or oven, heat pan or oven to 450°F (232°C). For popcorn popper or an electric roaster, follow the manufacturer’s startup instructions.
Add the Beans: Put the beans in your skillet, popper, or roaster. Start timer.
Stir or Agitate: Keep beans moving constantly to ensure even roasting and to prevent burning. With a popper, they’ll swirl on their own. With a pan, stir every 15-30 seconds. In the oven, shake the tray or stir every 1-2 minutes.
Watch and Smell: Beans will first yellow, then tan, then brown. They’ll start to smell grassy, then toasty, then coffee-like.
Listen for First Crack: Usually around 5–7 minutes in. Decide if you want a light roast (stop now), or keep going for medium/dark.
Monitor Second Crack: For darker roasts, listen for second crack (more rapid, sharper sounds, sometimes quieter than first crack). Stop roasting where you like the flavor profile.
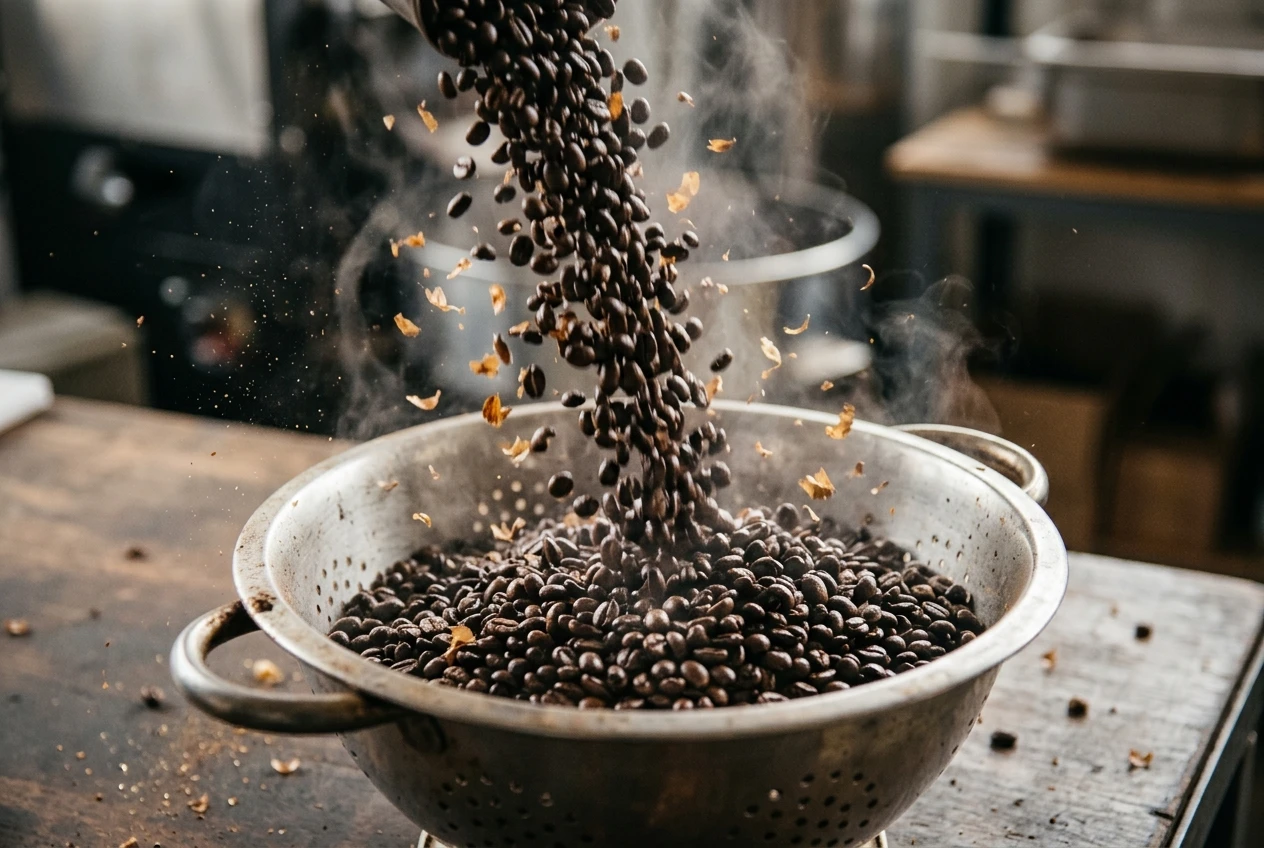
Dump and Cool: Pour the beans onto a baking tray or into a metal colander. Toss and stir to cool as quickly as you can. This stops the cooking and preserves the flavors.
Remove Chaff: Most of the papery chaff will come off during cooling. You can blow gently or swirl beans in the tray to get rid of as much as possible.
Rest Beans: Once cool, let beans rest in an open container for at least 4–12 hours. This releases some of the naturally produced CO2 and helps flavors smooth out.
Store Properly: After resting, move beans to an airtight jar or bag, away from direct sunlight.
Give yourself grace when learning: take notes, trust your senses, and don’t panic if your first few batches are a bit uneven or too dark. Every roast is another chance to tweak, taste, and improve. Over time, your personal ritual will become second nature and your coffee will keep getting better. If you want to track down local coffee communities or online forums, you’ll find plenty of tips and encouragement.
Cooling Your Beans (Why It Matters)
One thing I learned quickly is that beans keep cooking after you remove them from the heat if you don’t cool them down rapidly. This is called “carryover cooking.” If you want your chosen roast level, you’ll want to cool the beans as fast as possible after dumping them out of the roaster.
Some people use a metal colander and shake or toss the beans outdoors (to get rid of smoke and chaff). Others use a baking tray and spread the beans thinly for better airflow. A small desk fan speeds things up even more.
Tips for Fast Cooling
Use two metal colanders; pour beans back and forth (outside or over the sink, because chaff flies everywhere)
Spread beans on a baking tray and stir with a wooden spoon
A dedicated bean cooler with fan (can be DIY or bought online) is a nice upgrade if you’re roasting a lot
Quick cooling not only locks in your desired roast level, but can make those deeply fragrant notes pop. If you get creative, you can set up small cooling systems at home utilizing just a box fan and a mesh strainer—it doesn’t have to be fancy, just effective.
Why and How to Rest Your Freshly Roasted Beans
Fresh-roasted beans taste amazing, but they taste even better if you let them rest for a short period. Resting (or “degassing”) means allowing beans to release CO2 gas that builds up during roasting. If you brew seconds after roasting, the coffee can taste flat, sour, or oddly sharp. Letting beans rest usually brings out more sweetness and a smoother flavor profile.
How Long to Rest Beans
Light Roasts: 1–2 days
Medium Roasts: 12–36 hours
Dark Roasts: A few hours up to 1 day
I store fresh coffee in jars with the lids slightly open for the first day, then seal them after that. Some people use coffee bags with one-way valves, which let CO2 out but don’t let air in; super handy if you roast a lot.
Finding the perfect rest time may take a couple of tries. Taste your coffee at different points—a few hours post-roast, then again after 24 or 48 hours—to see when you like it best. Many find flavor hits its peak within the first week, so don’t let beans sit too long. Roasting small, regular batches means you can always have fresh coffee on hand.
Common Beginner Mistakes (And How to Avoid Them)
Not stirring or moving beans enough: This causes burned or uneven coffee. Keep beans moving the whole time.
Ignoring the cracks: These signal where you are in the roast. Listen closely.
Overfilling the roaster: Too many beans makes it hard for air and heat to circulate, leading to uneven roasting.
Not cooling beans quickly: Carryover heat can push your roast past what you wanted. Cool as rapidly as you can.
Skipping the resting period: Brewing right away can make coffee taste harsh. Give it a day if you can.
Getting discouraged by early results: Your first batch might not be perfect. Take notes, tweak your times and temps, and try again.
Not paying attention to smoke and chaff: Roasting produces a surprising amount of both. Plan for kitchen ventilation or roast outside if possible.
Keeping a simple notebook with details for each roast—bean type, date, weight, time, scent, and taste—helps you track what works best over time. You’ll get more consistent quickly this way.
Another pro tip: if possible, smell and taste coffee with friends or family. Sharing feedback helps you spot nuances you might miss and adds fun to the ride. Even pros make “happy mistakes” sometimes, so keep your sense of adventure alive.
What to Buy Next (Level Up Your Home Roasting)
Once you’re comfortable with basic roasting, you’ll notice small gear upgrades or adjustments can seriously improve your experience and, of course, your coffee.
Bigger or specialty roaster: Moves you from small-batch pan roasting to more consistent, larger batches (and usually less smoke and chaff mess)
Digital scale: Helps you roast precise amounts and repeat favorite batches exactly
Thermometer: Tracking the temperature inside your roasting vessel helps dial in your process instead of guessing
Dedicated cooling tray or fan: Makes cooling easier and quicker
Coffee grinder (burr): Freshly ground beans make a huge difference with your home-rosted coffee
Vacuum storage or coffee bags with valves: Keep your roasted coffee fresher for longer
There’s no rush to buy everything at once. Picking up a new tool when you feel limited by your current setup is the way to go. Focus on what will give a noticeable improvement to your daily brewing—sometimes small changes make all the difference.
Common Questions & Troubleshooting
What if I over-roast or burn my beans?
Everybody’s burnt a batch. Still tastes better than most store coffee! Blend it with a lighter roast batch and try again. If it’s badly scorched, use it for cold brew or compost.
Can I roast coffee without any special equipment?
Absolutely. All you need is a heavy skillet and a stove. Dedicated roasters help with consistency and convenience, but you can learn the craft with a pan or a popcorn popper just fine.
How smoky is it, really?
There’s always some smoke and chaff. For dark roasts, it can get pretty intense. Roasting near an open window or on a patio helps a lot. If you have a kitchen vent, crank it up.
How do I know when my beans are ready?
Use your senses! Listen for cracks, watch color changes, and sniff the beans—when they smell like roasted coffee and hit your roast color, you’re good. Over time, you’ll build a sense for it.
How long do home-rosted beans stay fresh?
Best flavor is usually within 7–10 days of roasting, especially if stored airtight. After that, flavor drops off a little, but your coffee is still drinkable for about a month.
Can I roast decaf coffee?
Totally! Look for green, unroasted decaf beans (they might look a little different). The roasting process is the same. Decaf beans lose color a bit more quickly, so keep a close eye during roasting.
Your First Roasting Action Plan
Pick up 1 lb of green coffee from a reputable source.
Choose your roast method and gear—skillet, popcorn popper, oven, or a dedicated roaster.
Plan for ventilation or roast on a patio if you can (for smoke and chaff).
Weigh out a small batch, preheat your gear, and start your first roast.
Listen, watch, and smell for the changes in your beans as you roast.
Cool and rest your beans, then taste and take notes!
Home coffee roasting is super approachable, doesn’t need fancy equipment to start, and pays off every time you brew with flavor, freshness, and real satisfaction. Once you try it, you’ll probably find yourself experimenting endlessly, because that’s half the fun.
If you’re already roasting coffee at home or just getting started, I’d love to hear what you’re using, what beans you enjoy, or what questions you’ve got. Your next great cup is only a roast away.
Happy roasting!